How to troubleshoot a 3 Phase Pump Controller?
Jun 05, 2025
Troubleshooting a 3 phase pump controller can be a daunting task, especially if you're not familiar with the inner workings of these complex devices. As a supplier of 3 phase pump controllers, I've encountered a wide range of issues over the years and have developed a systematic approach to diagnosing and resolving problems. In this blog post, I'll share some of my expertise and provide you with a step-by-step guide on how to troubleshoot a 3 phase pump controller effectively.
Understanding the Basics of a 3 Phase Pump Controller
Before we dive into the troubleshooting process, it's important to have a basic understanding of what a 3 phase pump controller is and how it works. A 3 phase pump controller is a device that manages the operation of a three-phase pump. It controls the start, stop, and speed of the pump, as well as provides protection against various electrical faults such as overcurrent, overvoltage, and undervoltage.
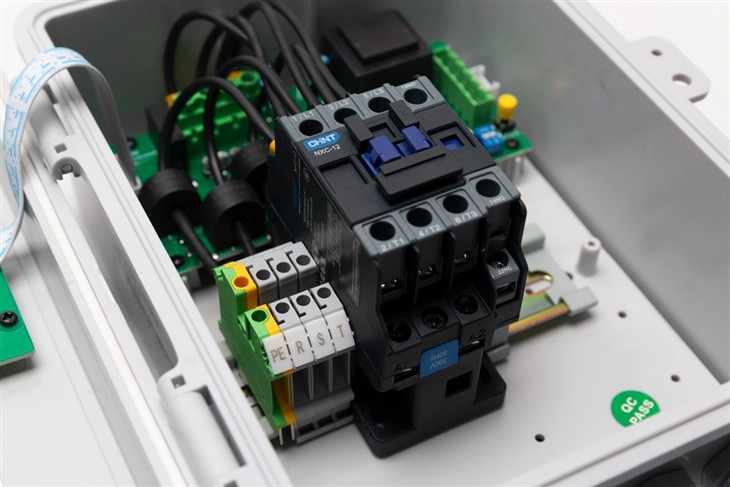
The main components of a 3 phase pump controller typically include a contactor, overload relay, circuit breaker, and control logic. The contactor is responsible for connecting and disconnecting the pump from the power supply, while the overload relay protects the pump motor from damage due to excessive current. The circuit breaker provides additional protection by interrupting the electrical circuit in the event of a short circuit or other serious fault. The control logic, which can be implemented using a programmable logic controller (PLC) or other control device, determines when the pump should start and stop based on various input signals such as pressure, level, or flow.
Step 1: Check the Power Supply
The first step in troubleshooting a 3 phase pump controller is to check the power supply. A faulty power supply can cause a variety of problems, including the pump not starting or running erratically. Here's what you should do:
- Verify the voltage: Use a multimeter to measure the voltage at the input terminals of the pump controller. The voltage should be within the specified range for the controller. If the voltage is too low or too high, it could indicate a problem with the power source or the electrical distribution system.
- Check the fuses and circuit breakers: Inspect the fuses and circuit breakers in the electrical panel to ensure they are not blown or tripped. A blown fuse or tripped circuit breaker can interrupt the power supply to the pump controller.
- Look for loose connections: Check all the electrical connections in the pump controller and the power supply circuit for looseness or corrosion. Loose connections can cause arcing and overheating, which can damage the components of the controller.
Step 2: Inspect the Contactor and Overload Relay
The contactor and overload relay are critical components of the pump controller, and they can often be the source of problems. Here's how to inspect them:
- Check the contactor contacts: The contacts of the contactor can become worn or pitted over time, which can cause poor electrical connection and intermittent operation. Inspect the contacts for signs of wear or damage, and replace the contactor if necessary.
- Test the overload relay: Use a multimeter to measure the resistance of the overload relay. If the resistance is outside the specified range, it could indicate a faulty relay. You can also check the calibration of the overload relay to ensure it is set correctly for the pump motor.
- Listen for abnormal noises: When the pump is running, listen for any abnormal noises coming from the contactor or overload relay. Clicking, buzzing, or humming sounds can indicate a problem with the components.
Step 3: Examine the Control Logic
The control logic of the pump controller is responsible for determining when the pump should start and stop. If the control logic is not working properly, the pump may not operate as expected. Here's what you can do to troubleshoot the control logic:
- Check the input signals: The control logic receives input signals from various sensors such as pressure switches, level sensors, or flow meters. Check these sensors to ensure they are working correctly and providing accurate signals to the controller.
- Review the programming: If the control logic is implemented using a PLC or other programmable device, review the programming to ensure it is correct. Look for any errors or incorrect settings that could cause the pump to malfunction.
- Test the output signals: Use a multimeter or other testing equipment to measure the output signals of the control logic. The output signals should be within the specified range and should change as expected based on the input signals.
Step 4: Evaluate the Pump Motor
If the pump controller appears to be working correctly, but the pump is still not running or is running poorly, the problem may be with the pump motor itself. Here's how to evaluate the pump motor:
- Check the motor windings: Use a multimeter to measure the resistance of the motor windings. If the resistance is outside the specified range, it could indicate a short circuit or open circuit in the windings.
- Inspect the motor bearings: The bearings of the pump motor can wear out over time, which can cause the motor to run noisily or inefficiently. Check the bearings for signs of wear or damage, and replace them if necessary.
- Look for overheating: Overheating can be a sign of a problem with the motor, such as a blocked cooling system or excessive load. Check the motor temperature using an infrared thermometer, and look for any signs of overheating, such as discoloration or a burning smell.
Step 5: Consider External Factors
In some cases, the problem with the 3 phase pump controller may not be due to a fault in the controller itself, but rather to external factors. Here are some external factors to consider:

- Environmental conditions: Extreme temperatures, humidity, or dust can affect the performance of the pump controller and the pump motor. Make sure the pump and controller are installed in a suitable environment, and take appropriate measures to protect them from harsh conditions.
- Water quality: If the pump is used to pump water, the quality of the water can have an impact on the performance of the pump and the controller. Contaminated water can cause corrosion and clogging of the pump components, which can lead to problems.
- Mechanical issues: Check the pump and the associated piping system for any mechanical issues such as leaks, blockages, or misalignment. These issues can affect the flow of water and cause the pump to operate inefficiently.
Conclusion
Troubleshooting a 3 phase pump controller requires a systematic approach and a good understanding of the components and operation of the controller. By following the steps outlined in this blog post, you can identify and resolve most common problems with the pump controller. However, if you are still unable to diagnose or fix the problem, it may be necessary to seek the assistance of a qualified technician.
As a supplier of Three Phase Submersible Pump Control Panel, 3 Phase Submersible Pump Control Panel, and 3 Phase Well Pump Control Box, we have the expertise and resources to provide you with high-quality products and technical support. If you have any questions or need assistance with troubleshooting your 3 phase pump controller, please feel free to contact us. We are committed to helping you keep your pumps running smoothly and efficiently.
References
- Electrical Engineering Handbook, Third Edition, edited by Richard C. Dorf
- Pump Handbook, Fourth Edition, edited by Igor J. Karassik